Your shopping cart is empty!
Categories
-
Products
- - New Products
- - Best Sellers
- - Keyboard
- - RS-485 Converter
- - Arduino
- - Raspberry Pi
- - Input/Output Expansion Board
- - ROBOT
- - Temperature / Humidity Modules
- - Motors / Motor Driver Boards
- - Wifi / Wireless Modules
- - Solid State Relay
- - Relay Modules
- - Sensors
- - Breadboards (Protoboards)
- - Wires / Cables
- - Components / Parts
- - IC
- - Connectors / Pin Headers
- - Heat Sinks
- - ESD Bag / Anti Static Bag
- - Healthy Products
- PCB Assembly
- Download
- Keyboard Technical Educator
- Technical Repair
- Learning from Experience
- Strategic Technical Consultant
- How to Order

การโปรแกรม Firmware สำหรับใช้งาน Keyboard - Keypad ด้วยโปรแกรม QMK Toolbox

 Posted: 05/07/2021
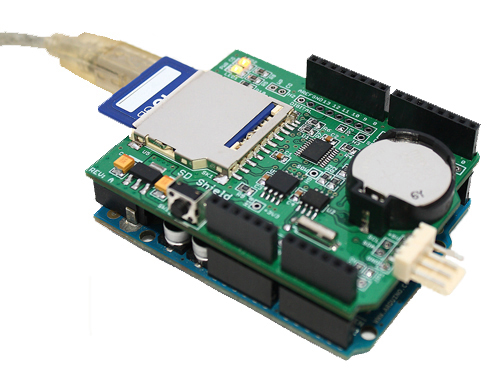
Read-Write SD Card
![]() Example : Read Write Program
Example : Read Write Program
- Insert your SD card into SD card reader of your computer to format your SD card for FAT16 or FAT32 file system.
- After already formatted your SD card then take off the formatted SD card from SD card reader of your computer.
- Stack SD Card Shield Plus to your another arduino board via Stacking Headers with Arduino Standard 0.1" Headers 8 pins & 6 pins.
- Insert the formatted SD card into SD card slot of SD Card Shield Plus and connects your another arduino board to your computer via USB cable.
- Double click on icon “Arduino ” program (Or double click “Shortcut to arduino” on your desktop) to open arduino on your computer which a free CD includes SD card libraries and example programs.
- Write Data : Open an example program is ReadWrite program to will be tested this SD Card Shield Plus is choose File>Examples>Examples_SD_Shield >SD>ReadWrite”
- After opened an example program is “ReadWrite program” will be shown detail of the C language code.
- Choose “Sketch>Verify/Compile” or click icon to verify and compile the C language code.
- If the C language code is correct and not found data error then information will be shown “Done compiling” and “Binary sketch size.
- Choose “File > Upload to I/O Board” or click icon to upload program into your arduino board.
- If completely uploaded an example program (ReadWrite program) then information will be shown “Done uploading” and “Binary sketch size.
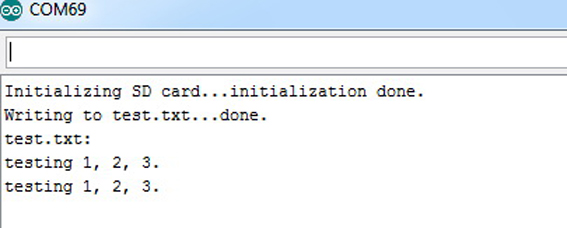
- Click icon is Serial Monitor to will be shown data about receives and sends data via the serial port.
- After clicked icon is “Serial Monitor” then will be shown “window of serial monitor ” is completely wrote “test.txt file” into SD card.
- You take off SD card from the SD card slot of SD Card Shield Plus.
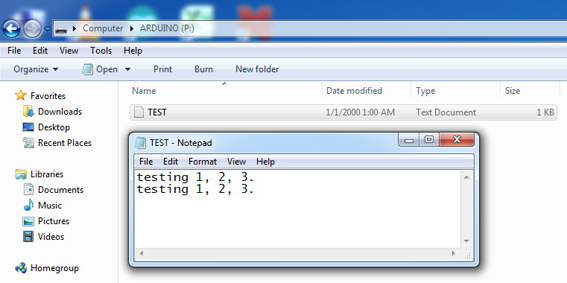
- Read Data : Insert SD card into the SD card reader of your computer then open data in SD card will be found “test.txt file” then double click “test.txt file” will be shown data is wrote into SD card.
Reference www.mltelectronic.com
")
SD Card Shield Plus for Arduino (Read/Write Data) &..
$11.73
Showing 1 to 1 of 1 (1 Pages)
Powered By MLT
MLT © 2026
MLT © 2026